Create a class
Creating classes is why you’re here. We’ve kept this process as simple as we could, while providing you with lots of flexibility to create classes in the right way for you.
Once you’re logged in to our website, you can create a class by hovering over Classes on the top menu, then click on Create a Class.

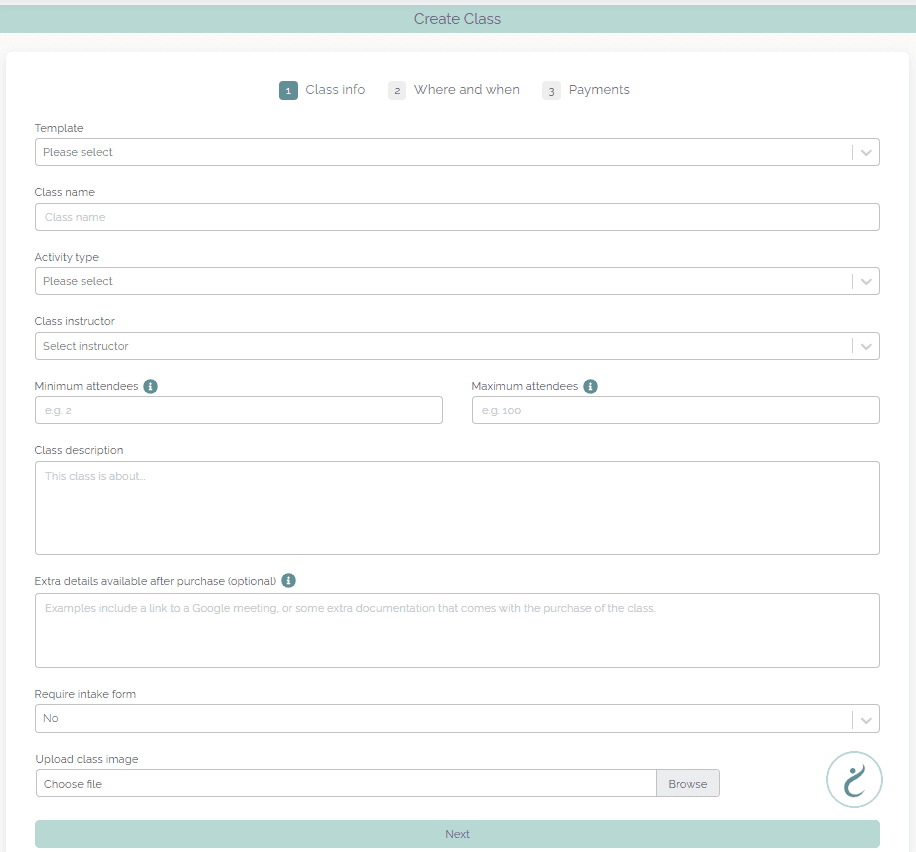
In the Create Class form everything should be quite simple. We’ve included some details below of the fields that may require a little more information:
- Select existing class details as template. We know that often different classes may have many of the same details. To save you filling them all in for every class, we have created templates for you. Every time you create a new class, we will create, or update your templates so you can automatically fill most fields with a single click. Then all you have to do edit the relevant fields.
- Select instructor. You need to select an instructor for all classes. You also can’t have one instructor teaching two classes at the same time.
- Minimum attendees.We know that some of our customers will cancel a class if enough customers don’t register. By selecting a minimum number here, we will email you if your class doesn’t reach this number 24 hours before the start time. We will never cancel a class on your behalf.
- Maximum attendees. This is the maximum number of people you would like to attend your class. After this number we will create a waitlist for you. If a space becomes available, we will immediately email those on your waitlist in an orderly fashion to let them know.
- Add medical questionnaire. Here we have provided you with set of common medical questions to ask your clients before they sign up. If you check one box, we will ask your client the question with no further action. If you check both boxes, we will ask them the question, and if they answer yes, we will stop them from joining your class. We will only ask each question to each client once and will store the results in your contact page for that specific client.

- Attendance type. This is simply In Person or Online via Zoom. If you are teaching a class in person you will need to input an address. If you are teaching a class online via Zoom, you will need to connect to your Zoom account. More on this here.
- Map class location. If you are teaching a class in person, it’s important that people know where to go. Click “Map Class Location” to input your address. This popup is connected to Google Maps and will offer you suggested known addresses based on what you input. When provided with a selection of addresses, pick the correct, or closest address to yours. Once you’ve done this you can edit the address in the free text field on the Create Class form to provide further details.
- Who can see this class. You can choose public or private. Public is the most common option for classes. Private will hide your class from all searches and clients will only be able to see it if you manually add them to the class, or share the class details page URL with them.

- Refund policy. We offer several types of refund policy including no refunds, and 100% refunds with several timing options. We also have our own “refund if replaced” refund option which adds a more human touch. This only charges clients who drop out, if the class was full at any time, and doesn’t remain full.
- Payment type. We offer two payment types; Online (via Stripe) or offline. To use our online payment you will need to connect your Stripe account to ClassFit. Offline payments mean we don’t touch any payments and you will be fully responsible for all client payments.
If you need any further help with this, please email hello@classfit.com.