

Adding your calendar to your wordpress.org or HTML website
If you have a website, you might want to add a custom branded calendar to it. The ClassFit calendar will allow your clients to book and pay for all classes from within your website. And you can custom brand it so its colors will perfectly match your business branding. This tutorial will show you how to integrate your calendar on a WordPress.org or HTML website. If you have a different type of website, please choose from our other tutorials below.
Once you’re logged in to our website, click on Tools on the left side menu, then click Calendar Widget.
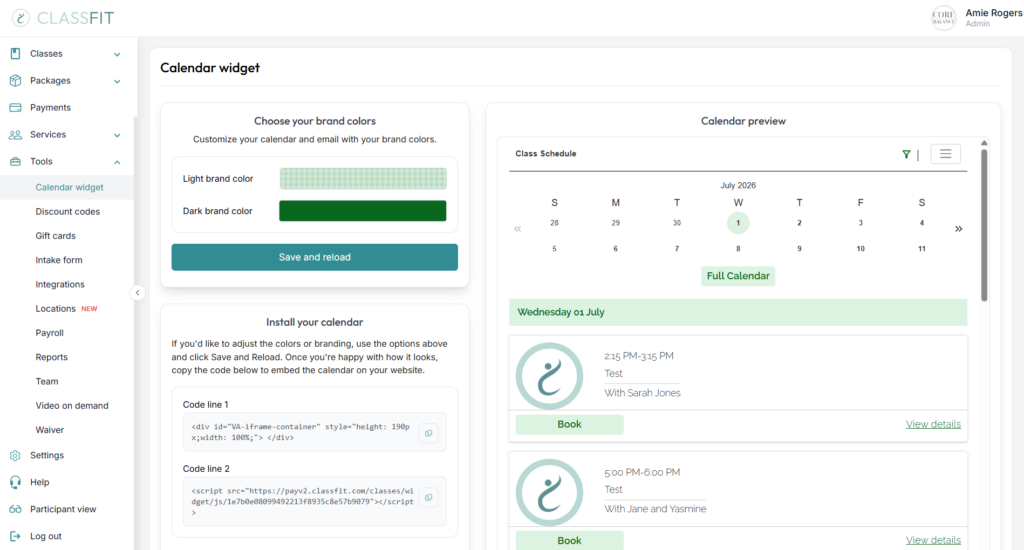
On this page you can select your light and dark brand colors. Start by selecting your brand colors, you can do this by clicking on the color and using the color picker, or by inserting the hex codes if you know them. Once we have all of this we will use your branding on all customer facing emails that relate to your business, and create your custom branded calendar.
After you’ve added your brand identity, we’ll show you a preview of what your calendar will look like in your website. If it’s not perfect the first time, don’t worry, you can go back and keep tinkering with the colors until it is just right.
Once you’re happy with your calendar branding, you can add it to your website. Click on Save and reload. Then scroll down, where you will see two lines of code. You will need to copy these lines of code onto the web page you want the calendar to appear. Where these lines go is slightly different depending on which type of website you have, so we will guide you through each website type below.

Adding your calendar to your WordPress website
Log in to your WordPress account and navigate to the page that you’d like to add your calendar to and select the “text” tab.

Now copy the first line of code from ClassFit.
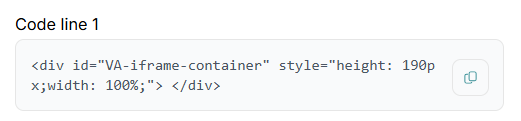
Then paste the code into your web page in the position you would like it to appear.

Once complete, return to ClassFit and copy the second line of code.
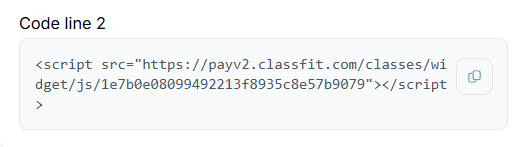
Now paste this line of code at the very bottom of the page, after all the other text.

Finally, click update on your WordPress page.

Now your new customized ClassFit calendar should be appearing perfectly on your website.
If you need any further help with this, please email [email protected].