


Switching to the new Stripe dashboard
ClassFit has built a new Stripe integration which sits within ClassFit. This means that you can access your Stripe dashboard from within classfit.com, and our new integration allows you to get refunds on all payment processing fees associated with refunded payments, something the traditional Stripe integration doesn’t. In this tutorial we’ll show you how to make the switch.
NB. This entire process should take 5-10 minutes at most, however during this time your classes will be hidden until you reconnect to Stripe and we have somewhere to send your client’s payments to again. So please ensure that you have all documentation to hand that you required when you first set up your Stripe account (business information, identity documents, bank details etc.) to ensure a speedy process.
Disconnecting from the original Stripe integration
The first thing we will need to do is disconnect your old Stripe account. Once you have logged into your account, navigate to Tools, and then Integrations (as below).

Once you have reached Integrations, click the “DISCONNECT” button (as below).

Connecting to Stripe
Once you have disconnected from Stripe, the page will reload and you will see a new option. Click “CONNECT”.

Once you have done this a popup will appear advising that you will be transferred to the Stripe website where you can create your new Stripe account.

Click OK. Then you will be taken to Stripe.com where you can create your new Stripe account within ClassFit. The first page will look like the below, however depending on your country, and business type future pages and Stripe requirements may differ. However Stripe will guide you through the process step by step.

Once you provide these details Stripe will ask you to authenticate your phone number by sending you a passcode (as below).

Once complete, if Stripe recognises your details they will ask you to use your existing Stripe details which they have on file, or to create a new business (as below).

Stripe will ask you a further set of questions to complete your account creation. The specific questions will depend on your choices, and location. An example list of questions could include:
- Business type
- Business details
- Legal business name
- Company (The name you provide must exactly match the name associated with your tax ID.)
- Companies House Registration Number (CRN)
- Doing business as (The trading name of your company, if it’s different to the legal name.)
- Registered business address (This address must match the address filed with the UK tax authority.)
- Business phone number
- Business website (No website? You can share an app store link, a business social media profile, or add a product description instead.)
Accessing your Stripe dashboard
Once you have successfully created your Stripe account you will be able to access your dashboard from within ClassFit in the same place you created it.

The first time you try to access your Stripe dashboard we will ask you to create a 4 digit PIN. This is to add an extra layer of security around your Stripe dashboard, and also so if you share access to your ClassFit account with other team members you can still keep this area private if you wish.
Once you have set this PIN up as above, you will need to enter it each time you access your Stripe dashboard in the future (as below). If you forget your PIN you can also reset it with an email sent to your email address.

Using your Stripe dashboard
When you first access your Stripe dashboard it will be empty (as below). Your previous payments will remain in your old Stripe account which you can access via Stripe.com and your new payments will be shown on this dashboard as they come through. It’s worth checking on your Stripe account status on this screen. If it says anything other than completed it means that Stripe require more information from you, which should be clarified if you hover over the status itself.
![]()
As you start to take payments your dashboard will look more like the below:

Managing payouts
By default, your payout schedule is set to pay your bank on the first date of each month. However you can change this to “manual” or automate this in a different way to your liking including weekly or monthly on the day of your choosing.

Managing refunds
If you need to refund a customer, you can do this from within your Stripe dashboard on ClassFit. Simply find the transaction in question and click the refund button on the same row (as below).
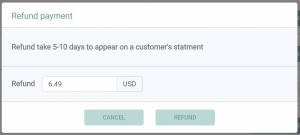
Then a new popup will appear where you can choose if you want to refund the full amount, or just a partial amount.
If you need any further help with this, please email hello@classfit.com.
